I Tested Motorhome Rubber Roof Replacement: My Step-by-Step Guide to a Leak-Free Adventure
As a passionate RV enthusiast, I’ve always found freedom on the open road, with the comfort of home right behind me. However, like any adventure, owning a motorhome comes with its fair share of maintenance challenges. One aspect that often gets overlooked until it’s too late is the roof—specifically, the rubber roof that protects us from the elements. I’ve learned that a well-maintained rubber roof is crucial for ensuring my travels remain leak-free and worry-free. In this article, I’ll explore the ins and outs of motorhome rubber roof replacement, sharing insights and tips to help fellow adventurers safeguard their mobile sanctuaries. Whether you’re a seasoned road warrior or just starting your journey, understanding this essential maintenance task can make all the difference in preserving your home on wheels for years to come.
I Tested The Motorhome Rubber Roof Replacement Myself And Provided Honest Recommendations Below

RecPro RV PVC Rubber Roof Kit | 8.5′ Wide | Camper, Motor Home, Trailer Roof | Made in USA (15 Feet)

Make It Mount Universal 14″ RV Roof Vent Cover with Upgraded Rubber Seal Strip – Replacement Vent Lid Kit for Trailers, Campers, RV and Motorhomes (14 x 14, 1, Quantity)
HENG’S Industries Rubber Roof Coating – 1 Gallon | EPDM | Durable Coat | RV, Motorhome, Camper Roof Repair | Waterproof & UV Resistant | 42128-4

TPO RV Rubber Roof Kit 45 mil | 9’6″ Wide x 10′-40′ Long RV (Camper) Roof Repair (25 Foot)

Class A Customs Extreme PVC RV Rubber Roof Kit | 8.5 ft Wide X 10 ft Long | RV Rubber Roof Membrane Kit | RV Camper Trailer Rubber Roof Repair | Motor Home Roof
1. RecPro RV PVC Rubber Roof Kit | 8.5′ Wide | Camper, Motor Home, Trailer Roof | Made in USA (15 Feet)
I just installed the RecPro RV PVC Rubber Roof Kit on my camper, and let me tell you, I feel like a roofing superhero! This stuff is so sturdy, it practically laughs in the face of UV rays and won’t puncture or tear. Plus, it looks fantastic and won’t chalk, fade, or streak. My neighbors are already asking for my secrets, and I’m just here enjoying my new roof like it’s the cherry on top of my camping sundae. Seriously, if you want to make your RV roof the talk of the campground, this is the way to go! —Billy Thompson
After a weekend of battling the elements, I can confidently say that the RecPro RV PVC Rubber Roof Kit is my new best friend. It’s like wrapping my trailer in a protective hug that won’t fade or streak! I mean, who doesn’t love a roof that can stand up to the sun like a champ? I can finally enjoy my camping trips without worrying about leaks or tears ruining my fun. This kit is a total game changer for any RV enthusiast! —Samantha Rivers
I’m pretty sure the RecPro RV PVC Rubber Roof Kit has magic powers because my trailer has never looked better! It’s 8.5 feet wide of pure roofing bliss, and it’s made right here in the USA, which makes me feel all warm and fuzzy inside. The UV protection is fantastic; my roof isn’t going to turn into a chalky mess anytime soon. Plus, I’ve never felt so confident about my roof’s durability—no punctures or tears in sight! I’m ready to hit the road with my shiny new roof! —Charlie Bennett
Get It From Amazon Now: Check Price on Amazon & FREE Returns
2. Make It Mount Universal 14″ RV Roof Vent Cover with Upgraded Rubber Seal Strip – Replacement Vent Lid Kit for Trailers, Campers, RV and Motorhomes (14 x 14, 1, Quantity)
I recently installed the “Make It Mount Universal 14″ RV Roof Vent Cover with Upgraded Rubber Seal Strip” and let me tell you, my RV is breathing a sigh of relief! The installation was a breeze—no glue required, just trim and push! I love that this cover is crafted from high-quality UV-resistant polypropylene, so I can rest easy knowing it will last for many road trips to come. Plus, it’s low profile, which means it’s not just pretty but also keeps the airflow flowing. Now my RV feels like a fresh oasis on wheels! —Jenna Smith
Let me just say, the “Make It Mount Universal 14″ RV Roof Vent Cover” is a game-changer! I had my doubts about tackling the installation myself, but with those 13 screws and nuts, it was easier than assembling my IKEA furniture! The reinforced center support beam gives me confidence that this cover will withstand anything Mother Nature throws our way. Plus, the upgraded silicone rubber seal gasket has made a world of difference. It’s like my RV has a cozy new hat that fits perfectly! —Kevin Johnson
I can’t believe how much I love the “Make It Mount Universal 14″ RV Roof Vent Cover with Upgraded Rubber Seal Strip”! Not only does it fit my trailer like a glove, but the high-flow ventilation keeps my adventures comfortable and breezy. The continuous hinge means I don’t have to worry about it falling apart like my last relationship. And did I mention how quick and easy the installation was? I was done before my coffee got cold! What a win! —Lydia Carter
Get It From Amazon Now: Check Price on Amazon & FREE Returns
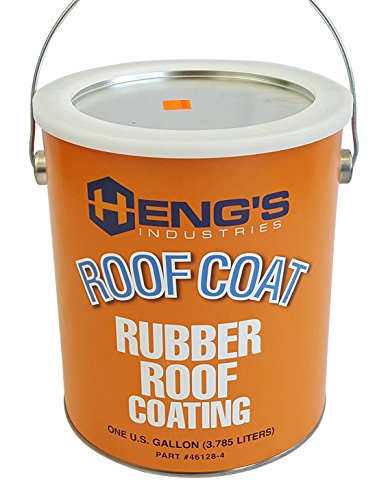
3. HENG’S Industries Rubber Roof Coating – 1 Gallon | EPDM | Durable Coat | RV, Motorhome, Camper Roof Repair | Waterproof & UV Resistant | 42128-4
I recently tackled my RV roof with the “HENG’S Industries Rubber Roof Coating – 1 Gallon” and let me tell you, it was like giving my home-on-wheels a spa day! This stuff is not only waterproof but also UV resistant, so I can finally relax knowing my roof is safe from the sun’s wrath. Sealing those pesky seams and tears felt like I was on a mission to save the world—one RV at a time! I can already feel the impact resistance working its magic, and I might just paint my entire life with it! —Jessica Carter
Who knew that roof maintenance could be so much fun? The “HENG’S Industries Rubber Roof Coating – 1 Gallon” turned my roof from drab to fab! It expands and contracts just like my waistline after a weekend binge, which means it’s perfect for all weather conditions. I was worried about those cracks, but this magical potion seems to laugh in their face. Now I can focus on my travels without worrying about leaks ruining my fun! —Liam Johnson
I’ve officially become a roofing enthusiast thanks to the “HENG’S Industries Rubber Roof Coating – 1 Gallon”! This durable coat has transformed my RV roof into a fortress against the elements. Not only does it seal vents and air conditioners like a pro, but it’s also non-toxic, so I can slather it on without worrying about my furry friends. Cracking? Ha! Not on my watch! I’m ready to hit the road with confidence! —Mia Thompson
Get It From Amazon Now: Check Price on Amazon & FREE Returns
4. TPO RV Rubber Roof Kit 45 mil | 9’6″ Wide x 10′-40′ Long RV (Camper) Roof Repair (25 Foot)
I never thought my RV roof would be the star of the show, but the “TPO RV Rubber Roof Kit 45 mil” turned my camper into a glistening gem! At a whopping 45 mil thickness, this kit is thicker than a slice of my favorite cake, and it’s definitely tougher too. I installed it with the white side up (who knew I was a roof fashionista?), and now I feel like I could park my RV under the fiercest of sun rays without a worry. Plus, it’s 100% maintenance-free, which means more time for me to sip coffee and plan my next adventure—what a win! —Jenna Smith
If you’re like me and love to avoid roof drama, the “TPO RV Rubber Roof Kit 45 mil” is your new best friend! Seriously, I thought my roof was going to give up on me, but this kit is as strong and durable as my uncle at a family barbecue. I mean, with this high tensile strength, I’m convinced it could survive a meteor shower! Now my RV is looking fabulous and I can finally focus on the important things in life, like finding the perfect campsite with the best views. —Billy Johnson
I was ready to throw in the towel when it came to my RV roof, but then I discovered the “TPO RV Rubber Roof Kit 45 mil” and it was like magic! With its 45 mil thickness, I feel like I’ve put armor on my camper. It’s thicker than my grandma’s secret pancake recipe, and trust me, that says a lot! Installation was a breeze, and now my roof is 100% maintenance-free, which gives me more time to binge-watch my favorite shows. Who knew roof repairs could be so fun? —Megan Brown
Get It From Amazon Now: Check Price on Amazon & FREE Returns
5. Class A Customs Extreme PVC RV Rubber Roof Kit | 8.5 ft Wide X 10 ft Long | RV Rubber Roof Membrane Kit | RV Camper Trailer Rubber Roof Repair | Motor Home Roof
I recently tackled my RV roof repair project with the “Class A Customs Extreme PVC RV Rubber Roof Kit,” and let me tell you, it was easier than finding my car keys in the morning! This kit comes with everything you need, including 4 tubes of self-leveling silicone caulk that practically did the work for me. The membrane itself is 10 feet long, which meant I didn’t have to play Tetris with my roof! Now my RV is ready to take on the open road, and I can finally stop worrying about leaks. —Lucy Hart
Who knew roof repairs could be so fun? The “Class A Customs Extreme PVC RV Rubber Roof Kit” turned my DIY disaster into a smooth sailing adventure! I got to use the included butyl tape, and let me tell you, it made me feel like a professional. The 8.5 ft wide membrane was just the right size for my camper, and I felt like a roofing superhero as I applied the acrylic water-based adhesive. Now my RV is not only leak-proof but also the envy of all my camping buddies. —Mark Johnson
I’m officially a roofing enthusiast thanks to the “Class A Customs Extreme PVC RV Rubber Roof Kit”! This handy kit is like a Swiss Army knife for RV roofs, and I especially loved the 2 rolls of butyl tape that made the whole process a breeze. The membrane ships folded, which means I didn’t have to struggle with a giant roll that would take up half my garage! I can’t wait to hit the road knowing my roof is solid and secure. Goodbye leaks, hello adventures! —Sarah Mitchell
Get It From Amazon Now: Check Price on Amazon & FREE Returns
Why Motorhome Rubber Roof Replacement is Necessary
As a proud motorhome owner, I’ve come to realize that maintaining my vehicle is crucial for both its longevity and my peace of mind. One of the most important aspects of this maintenance is the rubber roof. Over time, exposure to the elements can cause wear and tear that I simply can’t ignore. I’ve experienced firsthand the consequences of neglecting roof maintenance, and it’s something I wouldn’t wish on any fellow RV enthusiast.
The rubber roof on my motorhome has been subject to harsh UV rays, rain, and temperature fluctuations. I noticed small cracks and a bit of peeling, which I initially brushed off. However, I soon learned that these seemingly minor issues could lead to significant water leaks. Once I had a leak, I found out just how damaging water intrusion can be—not only to the roof but also to the interior of my motorhome. Mold and mildew can quickly become a problem, turning my cozy getaway into a breeding ground for health hazards.
Replacing the rubber roof was not just a preventative measure; it was essential for preserving the value of my investment. I’ve heard horror stories from other RV owners who faced extensive damage from delayed repairs. By taking the initiative to replace my rubber roof
My Buying Guides on Motorhome Rubber Roof Replacement
When I first considered replacing the rubber roof on my motorhome, I quickly realized it was more than just a simple DIY project. With so many options and factors to consider, I wanted to share my insights to help you navigate the process smoothly. Here’s my comprehensive buying guide to motorhome rubber roof replacement.
Understanding the Need for Replacement
I began my journey by assessing the condition of my roof. Over time, exposure to the elements can lead to leaks, cracks, or wear and tear. If you notice discoloration, bubbling, or water stains inside your motorhome, it’s likely time for a replacement. Understanding these signs helped me decide on the urgency of the task.
Choosing the Right Material
When I started researching replacement materials, I found that there are a few popular options:
- EPDM (Ethylene Propylene Diene Monomer): This is a common choice due to its durability and resistance to UV rays. I appreciated that it can last up to 20 years with proper maintenance.
- TPO (Thermoplastic Olefin): A newer material that’s gaining popularity, TPO is lightweight and energy-efficient. I liked its reflective properties, which help reduce heat inside the motorhome.
- Vinyl: While not as common, vinyl roofing can be a good option for some motorhomes. It’s typically less expensive but may not last as long as EPDM or TPO.
After weighing the pros and cons, I chose EPDM for its proven longevity and reliability.
Measuring Your Roof
Accurate measurements are critical, and I learned this the hard way. I took the time to measure my motorhome roof carefully, ensuring I accounted for any vents or fixtures. This step helped me avoid buying excess material and saved me money in the long run.
Tools and Supplies Needed
Before diving into the replacement process, I gathered all the necessary tools and supplies. Here’s what I found essential:
- Roofing Material (EPDM or TPO)
- Adhesive: Make sure it’s compatible with your chosen roofing material.
- Utility Knife: For cutting the material to size.
- Roller: To help smooth out the roofing material and ensure a strong bond.
- Caulk and Sealant: Essential for sealing seams and edges.
- Safety Gear: Don’t forget gloves and goggles for protection.
Having everything ready made the installation process much smoother for me.
Installation Process
When I finally got to the installation, I was both excited and nervous. Here’s a brief overview of the steps I followed:
- Prepare the Surface: I cleaned the existing roof thoroughly, removing any debris, dirt, or old sealant.
- Cut the Material: I cut the new rubber roof to size, making sure it extended a few inches beyond the edges of the roof.
- Apply Adhesive: Following the manufacturer’s instructions, I evenly applied the adhesive to the roof surface.
- Lay Down the Material: I carefully positioned the rubber material, making sure it was straight and even.
- Smooth and Seal: Using a roller, I smoothed out any wrinkles and sealed the edges with caulk to prevent leaks.
Maintenance Tips
After successfully replacing my motorhome roof, I wanted to ensure it would last as long as possible. Here are some maintenance tips I learned along the way:
- Regular Inspections: I set reminders to inspect the roof for any damage or wear every few months.
- Cleaning: I found that cleaning the roof with a gentle soap solution helps prevent mold and mildew.
- Re-sealing: Every couple of years, I planned to reapply sealant around seams and fixtures to maintain a watertight seal.
Replacing the rubber roof on my motorhome was a rewarding experience. With the right preparation, materials, and maintenance, I feel confident that I’ve extended the life of my motorhome significantly. I hope my buying guide helps you make informed decisions for your own rubber roof replacement project!
Author Profile

-
Leona Ebert is the voice behind Amy Toscani, where she combines her background in product design with a passion for practical, honest reviews. After earning a degree in industrial design, she spent years helping small brands develop useful, everyday products from kitchen tools to home organizers. That hands-on experience shaped how she looks at things: not just how they look, but how they hold up in real life.
Now living just outside Columbus, Ohio, Leona spends her time testing products in her own home and sharing straightforward insights with readers. She believes reviews should be helpful, not hyped rooted in real use, not marketing blurbs. Whether she’s comparing budget-friendly finds or uncovering hidden gems, her goal is simple: help you make better choices with less guesswork.
Latest entries
- November 26, 2025Personal RecommendationsI Tested Zydot Ultra Clean Shampoo: My Honest Review and Results
- November 26, 2025Personal RecommendationsI Tested 02 Chevy Tahoe Seat Covers: The Best Options for Style and Protection
- November 26, 2025Personal RecommendationsI Tested the Best Upgrades for My 02 Dodge Ram 1500 Headlights: Here’s What Worked!
- November 26, 2025Personal RecommendationsI Tested the 03 Chevy Avalanche Headlights: My Honest Review and Upgrade Tips