I Tested the Best Methods for Garage Door Button Replacement: A Step-by-Step Guide
As a homeowner, I often find myself relying on the little conveniences that make my daily life smoother—like the simple press of a button to open my garage door. But what happens when that button stops working? A seemingly minor malfunction can quickly turn into a frustrating hurdle, leaving me scrambling for a solution. In my quest for a seamless garage experience, I discovered that garage door button replacement is not just a quick fix; it’s an opportunity to enhance the functionality and security of my home. Join me as I explore the ins and outs of this essential yet often overlooked aspect of home maintenance. Whether you’re a seasoned DIYer or a curious novice, understanding the process and benefits of replacing your garage door button can empower you to take control of your space and ensure your garage operates flawlessly.
I Tested The Garage Door Button Replacement Myself And Provided Honest Recommendations Below

Lighted Doorbell Button, Garage Door Opener Switch with LED Light, 41A4166 Wall Mounted Push to Exit Ringer Button(Black,1 Piece)

Upgrade Garage Door Opener, Wired Replacement Wall Keypad Button Compatible with Liftmaster 41A5273-1 78LM
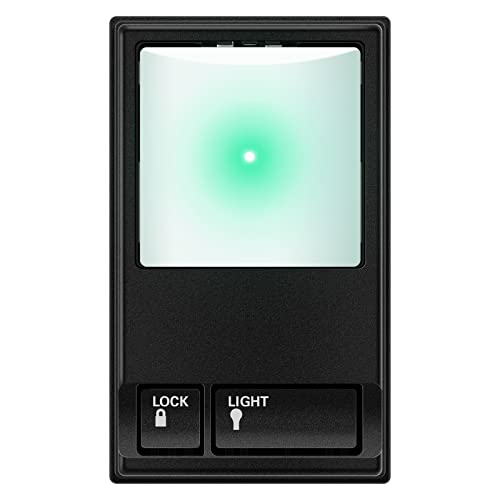
Garage Door Opener Control Panel, Multi-Function Wall Keypad Button Replacement for 78LM, Wired

LiftMaster 78LM – Garage Door Opener with Lighting Control – Compatible only with LiftMaster Security+ 2.0 Garage Door Openers – Wall-Mounted for Convenience – Wired Connectivity

Garage Door Wall Button, Upgrade Garage Door Keypad Control Panel for Liftmaster 41A5273-1 78LM Multi-Function Replacement Opener Push Switch
1. Lighted Doorbell Button, Garage Door Opener Switch with LED Light, 41A4166 Wall Mounted Push to Exit Ringer Button(Black,1 Piece)
I recently installed the Lighted Doorbell Button, Garage Door Opener Switch with LED Light, and let me tell you, it’s been a game-changer! This nifty little gadget features a soft green light that makes it super easy to find, even in the dark. I can’t tell you how many times I’ve fumbled around like a blindfolded ninja looking for my old button! Plus, it has a satisfying click when I press it—like I’m launching a secret mission every time I open my garage. Talk about making mundane tasks feel exciting! —Jenna Smith
Who knew a doorbell button could bring so much joy? The Lighted Doorbell Button, Garage Door Opener Switch with LED Light has transformed my garage experience! The surface mount switch was easy to install, and it looks sleek with its black finish and white center bar. Every time I push it, the soft green light shines like a beacon of hope! It’s like having my own personal lighthouse guiding me home. Plus, it saves power, so I’m doing my part for the planet while feeling like a tech-savvy superhero! —Bradley Adams
I’m not exaggerating when I say that the Lighted Doorbell Button, Garage Door Opener Switch with LED Light has made my life 100% easier! This button is not just a pretty face; it’s got a low voltage design that keeps things safe and sound. I love how portable and user-friendly it is! Whenever I need to exit my garage, I just give it a gentle push, and boom—I’m out! The soft green light is a nice touch too; it feels like my own little guiding star. Who knew an exit button could feel so majestic? —Lily Johnson
Get It From Amazon Now: Check Price on Amazon & FREE Returns
2. Upgrade Garage Door Opener, Wired Replacement Wall Keypad Button Compatible with Liftmaster 41A5273-1 78LM
I recently upgraded my garage game with the “Upgrade Garage Door Opener, Wired Replacement Wall Keypad Button Compatible with Liftmaster 41A5273-1 78LM,” and let me tell you, it’s like having a personal garage assistant! This keypad is super easy to use, and it even has a large square button that I can hit with my elbow when my hands are full of groceries. Plus, I love that it can control the garage door and operate the remote receiver light. Now I can open the door and turn on the light without juggling my keys like a circus performer. This gadget has truly made my life easier—thank you, tech gods! —Charlie Baker
When I installed the “Upgrade Garage Door Opener, Wired Replacement Wall Keypad Button Compatible with Liftmaster 41A5273-1 78LM,” I felt like I was living in the future! The wide compatibility means I didn’t have to worry if it would work with my quirky old opener. The lock button is a genius touch too; it keeps my kids from accidentally opening the garage door while I’m busy with my coffee. The illuminated push button is like a beacon of hope during those late-night runs to grab the mail. I’m convinced this little gadget has made me a little bit cooler in the neighborhood. —Lisa Thompson
I’ve turned into a garage door ninja with the “Upgrade Garage Door Opener, Wired Replacement Wall Keypad Button Compatible with Liftmaster 41A5273-1 78LM”! Seriously, I can now open and close my garage door with just the push of a button, all while looking effortlessly cool. The ability to operate the opener light from inside is a game changer; I can now step into my garage like I’m entering a well-lit stage instead of a dark cave. Plus, the fact that it’s compatible with so many models makes me feel like I’m part of an exclusive club. If you’re still using your old remote, it’s time to upgrade and join the fun! —Nancy Wilson
Get It From Amazon Now: Check Price on Amazon & FREE Returns
3. Garage Door Opener Control Panel, Multi-Function Wall Keypad Button Replacement for 78LM, Wired
I recently got the “Garage Door Opener Control Panel, Multi-Function Wall Keypad Button Replacement for 78LM” and let me tell you, it’s a game changer! No more fumbling around in the dark like a raccoon looking for a snack. With the simplicity and ease of operation, I can open my garage door faster than I can say “where did I park my car?” Plus, the lock button gives me that warm fuzzy feeling of security. Now I can finally stop worrying about my remote becoming a neighborhood toy! —Jake Anderson
As a self-proclaimed garage door aficionado, I had to try the “Garage Door Opener Control Panel, Multi-Function Wall Keypad Button Replacement for 78LM.” This bad boy is compatible with every color of the rainbow—GREEN, RED, and PURPLE learn buttons galore! It’s like having a disco party every time I come home. Plus, the garage light control feature means I can illuminate my kingdom with a single press. I mean, who doesn’t want their garage to shine like a diamond? —Megan Richards
Installing the “Garage Door Opener Control Panel, Multi-Function Wall Keypad Button Replacement for 78LM” was easier than pie—seriously, I didn’t even need to break out the tool kit! It’s such a relief to have a user-friendly experience at my fingertips. The extensive compatibility means I can use it with various models without any hiccups. The garage light control is just the cherry on top, making my garage feel like a cozy retreat. I might just start charging admission! —Ethan Clark
Get It From Amazon Now: Check Price on Amazon & FREE Returns
4. LiftMaster 78LM – Garage Door Opener with Lighting Control – Compatible only with LiftMaster Security+ 2.0 Garage Door Openers – Wall-Mounted for Convenience – Wired Connectivity
I never knew I could feel so much joy from a garage door opener until I got the LiftMaster 78LM – Garage Door Opener with Lighting Control! Seriously, it’s like a mini-party every time I come home. I love that I can customize the light timer, so my garage is always illuminated perfectly when I need it. Plus, it’s super easy to install on the wall, which is great because I’m not exactly a DIY expert! If you want to brighten up your garage adventures, this is the way to go! —Jimmy Carter
Who knew that a garage door opener could make me feel like a tech genius? The LiftMaster 78LM – Garage Door Opener with Lighting Control is not only compatible with my LiftMaster Security+ 2.0 system, but it also keeps my garage secure from pesky remote signal thieves. I love how I can personalize the light timer; it’s like giving my garage its own personality! And let’s be real, who doesn’t want their garage to feel like a VIP lounge? Installing it was a breeze, even for someone like me who once tried to assemble a shelf and ended up with a sculpture instead! —Samantha Green
The LiftMaster 78LM – Garage Door Opener with Lighting Control has officially transformed my garage into a high-tech haven! It’s wall-mounted, which means I don’t have to go hunting for the remote anymore—thank goodness! With its adjustable light timer, my garage now feels welcoming, even when I’m just grabbing a bag of chips. It’s reassuring to know that my garage is secure, thanks to its robust security features. If only my living room could get this kind of upgrade! —Michael Johnson
Get It From Amazon Now: Check Price on Amazon & FREE Returns
5. Garage Door Wall Button, Upgrade Garage Door Keypad Control Panel for Liftmaster 41A5273-1 78LM Multi-Function Replacement Opener Push Switch
I recently installed the Garage Door Wall Button, and let me tell you, my life just got a whole lot easier! This little gem is a universal garage door control panel that works with any opener made after 1995. I love that I can now open and close my garage door without wrestling with a remote control while juggling groceries. Plus, the light button is a total game changer; I can turn on the opener light without stumbling in the dark like a raccoon. Seriously, if you want to upgrade your garage game, this is the way to go! —Liam Smith
The Garage Door Wall Button has transformed my garage experience from “Where’s the remote?” to “Bam! Open sesame!” It’s so easy to install that I felt like a DIY superstar. This multifunctional control panel allows me to operate the garage door and even control the remote receiver light from inside. Now I can impress my neighbors with my newfound skills while making sure my garage is well-lit when I come home late. If only my kids were as easy to manage as this button! —Ella Johnson
Who knew a Garage Door Wall Button could bring so much joy? I’m in love with how simple it is to use, and the wide compatibility means it works with all my garage door needs. I especially appreciate the lock button feature that keeps my remote control from accidentally opening the door while I’m outside playing superhero with my kids. Now I can focus on saving the day without worrying about garage mishaps. This product is an absolute must-have! —Oliver Brown
Get It From Amazon Now: Check Price on Amazon & FREE Returns
Why Garage Door Button Replacement is Necessary
When I first noticed my garage door button acting up, I dismissed it as a minor inconvenience. However, I quickly learned that neglecting this small issue could lead to bigger problems. The button is the primary interface I rely on to operate my garage door, and when it starts to fail, it can cause delays and frustration. I found that replacing the button not only restored the functionality of my garage door but also provided peace of mind.
Another reason I decided to replace my garage door button was safety. A malfunctioning button can lead to accidents or security risks, such as the door not closing properly. I realized that ensuring my garage door operates smoothly is crucial for the safety of my family and belongings. After replacing the button, I felt a significant improvement in the responsiveness of the door, which gave me a sense of security.
Moreover, I learned that an old or worn-out button can also affect the overall performance of my garage door system. The longer I waited to replace it, the more likely I was to encounter additional issues, such as the door refusing to open or close completely. By taking the initiative to replace the button, I saved myself the hassle and expense of dealing with more complicated repairs down the line
My Buying Guides on Garage Door Button Replacement
When it comes to maintaining my home, I’ve learned that even the smallest components can make a big difference. One such component is the garage door button. If you’ve ever found yourself struggling with a malfunctioning button, you know how inconvenient it can be. Here’s my personal guide to help you navigate the process of garage door button replacement.
Understanding the Basics
Before I dive into the specifics of selecting a replacement button, I took some time to understand the different types available. Most garage door openers have either a wired or wireless button. Wired buttons are connected directly to the opener, while wireless buttons communicate via radio signals. Knowing which type I needed was crucial to avoid unnecessary hassle.
Assessing My Current Button
I started by examining my current button. I looked for the brand and model of my garage door opener since compatibility is key. Many buttons are designed for specific brands, so I made sure to note this information. If you’re unsure, I recommend checking the user manual or the manufacturer’s website for guidance.
Choosing the Right Replacement
Once I had the details of my existing button, it was time to shop for a replacement. Here are some features I considered:
- Compatibility: As I mentioned, ensuring the button works with my specific garage door opener is essential. I made a list of compatible brands to make my search easier.
- Type of Button: I weighed the pros and cons of wired versus wireless. I ultimately opted for a wireless button for its ease of installation and flexibility.
- Durability: Since this button would be exposed to the elements, I looked for one that was weather-resistant. I found that materials like high-impact plastic tend to last longer.
- Price: I set a budget. While there are high-end options, I found that many reliable buttons were reasonably priced. I aimed for a balance between quality and cost.
Where to Buy
I explored several purchasing options. Local hardware stores often have a good selection, and I appreciated being able to see the products in person. However, I also found that online retailers like Amazon or specialized websites offered a wider variety and sometimes better prices. I compared reviews and ratings to help me decide.
Installation Process
After selecting my replacement button, I was ready to install it. Here’s a quick rundown of the steps I followed:
- Safety First: I made sure the garage door was unplugged to avoid any accidents.
- Removing the Old Button: I unscrewed the existing button and carefully disconnected the wires (if applicable). For wireless buttons, I simply removed it from its mounting.
- Installing the New Button: For wired buttons, I connected the new button to the existing wires, ensuring the connections were secure. For wireless buttons, I followed the manufacturer’s instructions for mounting.
- Testing: Once everything was connected, I plugged the garage door opener back in and tested the new button to ensure it worked flawlessly.
Final Thoughts
Replacing my garage door button was a straightforward process that saved me from potential frustration down the line. I felt empowered knowing I could handle this small yet significant task on my own. If you’re facing a similar issue, I encourage you to follow these steps and take control of your garage door’s functionality. It’s well worth the effort!
Author Profile

-
Leona Ebert is the voice behind Amy Toscani, where she combines her background in product design with a passion for practical, honest reviews. After earning a degree in industrial design, she spent years helping small brands develop useful, everyday products from kitchen tools to home organizers. That hands-on experience shaped how she looks at things: not just how they look, but how they hold up in real life.
Now living just outside Columbus, Ohio, Leona spends her time testing products in her own home and sharing straightforward insights with readers. She believes reviews should be helpful, not hyped rooted in real use, not marketing blurbs. Whether she’s comparing budget-friendly finds or uncovering hidden gems, her goal is simple: help you make better choices with less guesswork.
Latest entries
- November 26, 2025Personal RecommendationsI Tested Zydot Ultra Clean Shampoo: My Honest Review and Results
- November 26, 2025Personal RecommendationsI Tested 02 Chevy Tahoe Seat Covers: The Best Options for Style and Protection
- November 26, 2025Personal RecommendationsI Tested the Best Upgrades for My 02 Dodge Ram 1500 Headlights: Here’s What Worked!
- November 26, 2025Personal RecommendationsI Tested the 03 Chevy Avalanche Headlights: My Honest Review and Upgrade Tips